Unlock Your Potential: The Diaal News Guide to Building Your Personal Website in 2026
For everyday readers like you, navigating the world of domains, hosting, and website builders can feel overwhelming. You might worry about the cost, the technical know-how, or simply where to begin. But let’s be real: building a personal website today is more accessible and affordable than ever before. You don’t need to be a tech wizard or spend a fortune. What you need is a clear, practical roadmap – and that’s exactly what this Diaal News guide provides.
We’ll cut through the jargon, offer actionable steps, share real numbers, and equip you with the confidence to launch your own professional online hub. Whether you’re looking for a new job, starting a side hustle, showcasing your creative work, or simply want to control your personal narrative, your future self will thank you for taking this step. Let’s get started!
Why You Absolutely Need a Personal Website in 2026
The digital landscape is constantly evolving, and your online presence needs to keep pace. Here’s why a dedicated personal website is not just an option, but a critical investment in your professional and financial future in 2026:
- Your Professional First Impression: In current times, your online presence often precedes you. Recruiters, potential clients, and collaborators will Google your name. A professional website ensures they find a polished, curated representation of who you are and what you do, rather than scattered social media posts or outdated profiles. It’s your chance to make a powerful, positive first impression every time.
- Showcase Your Expertise and Portfolio: Unlike a static resume or a limited social media profile, a personal website provides an expansive canvas to display your work. Whether you’re a writer, designer, consultant, programmer, or even a project manager, you can feature case studies, articles, projects, testimonials, and detailed explanations of your skills and accomplishments. This builds credibility and demonstrates your capabilities far more effectively.
- Control Your Narrative: Don’t let social media algorithms or third-party platforms dictate how you’re perceived. Your personal website gives you complete control over your brand message, your story, and the information you want to highlight. It’s your digital home base, where you set the rules and shape the conversation about yourself.
- Expand Your Network and Opportunities: A well-optimized personal website makes it easier for people to discover you. It serves as a central hub where potential employers can find your resume, clients can learn about your services, and collaborators can understand your value. It’s a passive lead generation tool, working for you 24/7 to attract new opportunities.
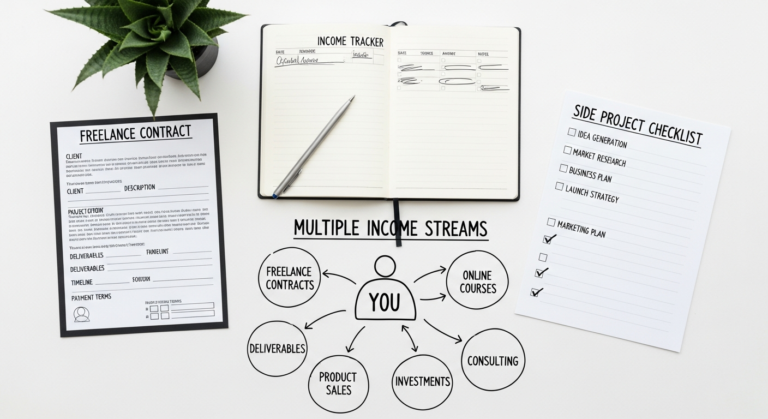
- Monetize Your Skills and Passions: For many, a personal website is the launchpad for a side hustle, a freelance career, or even a full-fledged business. You can use it to sell digital products (e.g., e-books, courses), offer consulting services, host a paid newsletter, or promote affiliate products. It provides the platform you need to turn your expertise into income.
- Build Authority and Thought Leadership: By regularly sharing your insights through a blog or articles on your site, you establish yourself as an expert in your field. This thought leadership not only enhances your reputation but can also open doors to speaking engagements, media features, and other high-value opportunities.
Think of it as investing in your most important asset: yourself. A personal website is a tangible investment that pays dividends in career advancement, financial independence, and personal branding.
Planning Your Personal Website: The Blueprint for Success
Before you dive into picking colors and fonts, let’s lay a solid foundation. A little planning goes a long way in ensuring your website serves its purpose effectively. This isn’t about rigid rules, but about clarity and direction.
1. Define Your “Why” and Set Clear Goals
What do you want your website to achieve? Be specific. Your goals will dictate your content and design choices.
- Job Search: “I want to attract potential employers and showcase my resume and portfolio.”
- Freelancing/Consulting: “I want to attract new clients, display my services, and generate leads.”
- Personal Brand/Thought Leadership: “I want to share my expertise, build an audience, and establish myself as a leader in my industry.”
- Side Hustle/E-commerce: “I want to sell my digital products or services online.”
- Creative Portfolio: “I want to display my artwork, photography, or design projects to potential buyers or collaborators.”
Knowing your primary goal will keep you focused and prevent your website from becoming a cluttered digital mess.
2. Identify Your Audience
Who are you trying to reach? Understanding your audience helps you tailor your language, content, and calls to action.
- Employers/Recruiters? Focus on professionalism, achievements, and clear career aspirations.
- Potential Clients? Highlight problem-solving, results, and clear service offerings.
- Fellow Professionals/Industry Peers? Share in-depth insights and foster community.
- Customers for your products? Emphasize benefits, testimonials, and ease of purchase.
Speak directly to them. What questions do they have? How can you help them?
3. Map Out Your Core Content
Based on your goals and audience, decide what essential pages and information your site needs. Here are common pages for a personal website:
- Home Page: Your digital storefront. A compelling headline, a brief introduction to what you do, and clear navigation to your most important sections. Think of it as a quick summary and a roadmap.
- About Me/Bio: This is where your personality shines. Share your story, your mission, your values, and your professional journey. What makes you unique? Include a professional headshot.
- Portfolio/Services:
- For Job Seekers/Freelancers: Showcase your best projects, case studies, or writing samples. Include descriptions of your role, the challenges, your solutions, and the results achieved.
- For Service Providers: Clearly outline the services you offer, your process, and the benefits clients can expect.
- For Creatives: Display high-quality images or videos of your work, categorized for easy browsing.
- Resume/CV: Often, you’ll want a dedicated page or a downloadable PDF link to your full resume.
- Blog/Insights (Optional but Recommended): A blog is excellent for demonstrating expertise, sharing thoughts, and improving your site’s search engine visibility. Even a few high-quality articles can make a big difference.
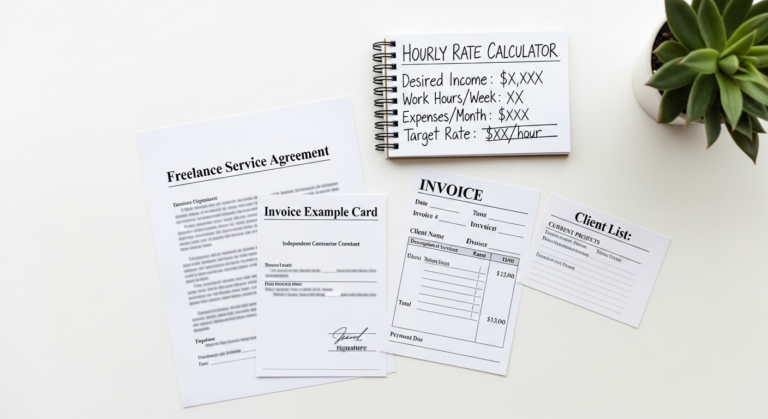
- Contact: Make it easy for people to reach you. Include a contact form, your professional email address, and links to your relevant social media profiles.
- Testimonials/Endorsements: Social proof is powerful. Include quotes from past clients, colleagues, or supervisors.
Gather all your content assets now: your professional headshot, written bio, project descriptions, work samples, and any testimonials. Having these ready will streamline the building process.
4. Sketch Your Structure and Design Ideas
You don’t need to be a designer, but think about the overall look and feel. What kind of aesthetic aligns with your brand? Professional? Creative? Minimalist? Browse other personal websites for inspiration.
- Navigation: Keep your main menu simple and intuitive.
- Color Palette: Choose 2-3 primary colors that reflect your brand.
- Font Choices: Select legible fonts that are easy on the eyes.
- Layout: How will your content be organized on each page?
Remember, your website should be easy to navigate, visually appealing, and reflective of your professional identity. Less is often more, especially when you’re starting out.
Choosing Your Tools: Platforms, Domains, and Hosting Explained
Now that you have your blueprint, it’s time to gather your building materials. This section might sound technical, but we’ll break it down into plain English, along with real-world costs so you can budget effectively.
1. Your Domain Name: Your Unique Address (e.g., yourname.com)
Your domain name is your website’s address on the internet. It’s how people find you. For a personal website, yourname.com (or a variation like yournameportfolio.com) is ideal because it’s professional and memorable.
- Tips for Choosing:
- Keep it short, memorable, and easy to spell.
- Prioritize .com if available; it’s the most recognized.
- Avoid hyphens or numbers if possible, as they can be confusing.
- Check if your desired name is available at registrars like GoDaddy, Namecheap, or Google Domains.
- Cost: Expect to pay around $10 – $20 per year for a standard .com domain. Many hosting providers offer a free domain for the first year if you purchase hosting through them.
2. Your Website Platform: How You Build It
This is the software or service you’ll use to create and manage your website. There are two main paths, each with its pros and cons:
Option 1: All-in-One Website Builders (Easiest, Less Technical)
These platforms provide everything you need in one package: templates, drag-and-drop editors, hosting, and often a free domain for the first year. They’re excellent for beginners who want a professional site up quickly with minimal fuss.
- Examples: Squarespace, Wix, Weebly.
- Pros:
- Ease of Use: Intuitive drag-and-drop interfaces mean no coding required.
- Speed of Setup: You can have a basic site live in a weekend.
- Design Templates: Professional, mobile-responsive templates are included.
- Hosting & Security: Handled entirely by the platform.
- Customer Support: Dedicated support teams are available.
- Cons:
- Less Customization: While templates are good, you have less granular control over design and functionality compared to self-hosted WordPress.
- Monthly/Annual Fees: Can be more expensive long-term than self-hosted options.
- Vendor Lock-in: Migrating your site to a different platform later can be challenging.
- Cost: For a basic personal website, expect to pay around $15 – $30 per month (often cheaper if paid annually).
- Best for: Beginners, creatives, small businesses, or anyone prioritizing ease and speed over ultimate customization.
Option 2: Self-Hosted WordPress (More Control, Slightly Steeper Learning Curve)
This path involves purchasing hosting separately and then installing the free, open-source WordPress software (WordPress.org, not WordPress.com) onto your hosting account. It offers unparalleled flexibility and scalability.
- What You Need:
- Web Hosting: This is like renting digital land where your website’s files live. When someone types your domain name, their browser retrieves your website from your host.
- WordPress.org: The free software you install on your hosting. It powers nearly 40% of all websites on the internet.
- Examples of Hosts: Bluehost, SiteGround, Hostinger, WP Engine (for more advanced needs).
- Pros:
- Ultimate Flexibility: Thousands of free and premium themes and plugins allow for almost any design or functionality imaginable.
- Scalability: Easily grow your site from a simple portfolio to a complex e-commerce store or membership site.
- Cost-Effective Long-Term: After initial setup, ongoing costs can be lower than builders.
- Full Ownership & Control: You own all your data and can move your site to any host.
- Cons:
- Slightly More Technical Setup: While most hosts offer “one-click WordPress installation,” there’s a bit more to learn initially.
- Maintenance Responsibility: You’re responsible for updates, security, and backups (though many hosts offer tools to help).
- Potential Hidden Costs: While WordPress software is free, you might pay for premium themes, plugins, or professional support if needed.
- Cost:
- Hosting: Shared hosting plans typically start at $3 – $15 per month (often with lower introductory rates for the first year, then renew higher).
- WordPress.org: Free.
- Premium Themes/Plugins (Optional): Can range from a one-time fee of $50-$100 or a yearly subscription.
- Best for: Those who want full control, plan to grow their site significantly, or are comfortable with a slightly steeper learning curve for greater long-term power.
3. Niche Portfolio Platforms (Supplements, Not Replacements)
Platforms like Behance or Dribbble (for designers), GitHub (for developers), or LinkedIn’s profile features are excellent for showcasing specific types of work or connecting with peers. However, they are not a substitute for a personal website, as they offer limited branding, customization, and control compared to a dedicated site you own.
For most Diaal News readers, especially those just starting, website builders (Wix, Squarespace) offer a quick, cost-effective way to get a professional site online. If you’re more technically inclined or anticipate significant growth, self-hosted WordPress provides unmatched power and flexibility.
Building Your Website: Step-by-Step Action Plan
Alright, you’ve planned your site and chosen your tools. Now for the exciting part: bringing your vision to life! This section provides a practical, step-by-step guide to building your personal website.
Step 1: Secure Your Domain and Hosting (If Using Self-Hosted WordPress)
If you opted for an all-in-one website builder, you can skip this step, as hosting and often a domain are included in your plan.
- Choose a Hosting Provider: Head to a reputable host like Bluehost, SiteGround, or Hostinger. Look for a shared hosting plan, which is usually the most affordable for a personal site.
- Select Your Plan: Start with a basic plan. You can always upgrade later if your traffic grows significantly.
- Register Your Domain: During the signup process, you’ll be prompted to register your chosen domain name. Many hosts offer a free domain for the first year with a new hosting package.
- Install WordPress: Once your hosting account is set up, most providers offer a “one-click WordPress installation” option in your control panel (cPanel). Follow their instructions, which are typically very straightforward. You’ll set up your WordPress admin username and password here.
Step 2: Choose Your Platform & Template/Theme
This is where your design comes to life.
- For Website Builders (Wix, Squarespace):
- Log into your account and navigate to the “Templates” or “Designs” section.
- Browse the available templates, filtering by category (e.g., “Portfolio,” “Resume,” “Blog”).
- Select a template that aligns with your aesthetic preferences and the content you plan to include. Don’t worry too much about the demo content; you’ll replace it.
- Start editing the template.
- For Self-Hosted WordPress:
- Log into your WordPress admin dashboard (usually by going to yourdomain.com/wp-admin).
- Go to Appearance > Themes > Add New.
- Browse the thousands of free themes available in the WordPress directory. Popular, well-regarded free themes include Astra, Kadence, GeneratePress, and Neve. These are lightweight and highly customizable.
- Alternatively, if you’ve purchased a premium theme, click “Upload Theme” and install it.
- Once you find a theme you like, click “Install” and then “Activate.”
Step 3: Customize Your Design and Layout
Now, make it truly yours. This is done visually, without code.
- Branding: Upload your logo (if you have one) or type in your site title. Choose a consistent color palette (2-3 main colors) and font styles that reflect your personal brand.
- Navigation Menu: Create a clear, intuitive navigation menu that includes your main pages (e.g., Home, About, Portfolio, Blog, Contact). Most platforms have a dedicated menu editor.
- Layout and Sections: Use the drag-and-drop editor (for builders) or the WordPress block editor/page builder (like Elementor or Beaver Builder, which you might install as a plugin) to arrange sections on your pages. Add image galleries, text blocks, video embeds, and call-to-action buttons.
- Hero Section: Design the top section of your homepage. This should clearly state who you are and what you do, with a compelling image or background video.